The last of summer and fall in most of the U.S. means county and state fair time. It’s the culmination of our youth and families work that started in the barn. These shows are a time to showcase the projects that have taught our children so much about what it takes to be a winner even if the ribbon doesn’t end up showing it.
For parents it’s also a time to feed the hungry crowds that always seem to gather right around feeding time for both animals and humans! Each year I pack my big black food box with wheels, that my husband surprised me with, for housing all my cooking tools, crock pots, roasters, spices and foods that I need in order to feed our hungry family and friends. We have found that it’s easier to feed everyone at the barn so that when you finally get to leave you don’t spend a ton of time and money at restaurants when you could be getting rest and ultimately valuable sleep for the busy next show day!
Recipes we cook must feed a crowd and be simple enough to cook on ‘low’ as it heats in our roasters to feed everyone as they are ready to eat after either showing or feeding their animals.
Today in anticipation of this special time of the year, I have shared a new recipe and few tried and true ones that can easily be prepared for your groups and enjoyed anytime of the year in or out of the show barn!
Good luck at your state and county fairs! What a fun time you have ahead, and if you are looking for more great recipes be sure to check out The Ranch Kitchen blog.
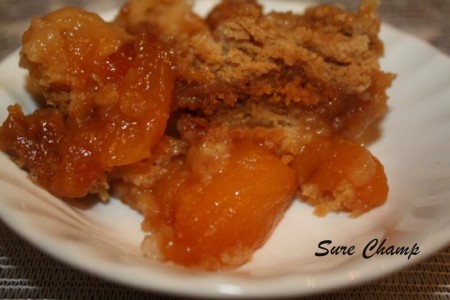
Sure Champion Crockpot Peach Cobbler
2 cans peach pie filling
1 stick butter or margarine (8 tablespoons)
1 box white or yellow cake mix
Prepare your crock pot by spraying with Pam cooking spray over the entire inside. Place one can of peach pie filling or really any pie filling of your choice. Sprinkle the cake mix over the pie filling evenly. Melt one stick of butter or margarine in a microwave safe bowl and pour as evenly as possible over the cake mix. Turn on crock pot on high and cook for 3 – 4 hours with top securely on. Serve alone or with vanilla ice cream!
Variation: I also made this recently with fresh peaches.
**Mix 1 ½ cups sugar with 4 cups fresh peaches. Allow peaches to sit for thirty minutes in order for them to make their own juice. Use peach and sugar mixture as you would peach pie filling and follow the recipe above.
2 lbs of ground hamburger meat, browned and drained with
1 onion, chopped fine
1 large can green chili’s
1 can Rotel Tomatoes
2 packages of cornbread, prepared according to directions uncooked (not baked yet) or homemade cornbread uncooked
1/2 cup milk (for cornbread)
2 eggs, beaten (for cornbread)
1 can cream of corn (for cornbread)
2 – 4 cups Mexican Blend grated cheese or mild or sharp cheddar cheese
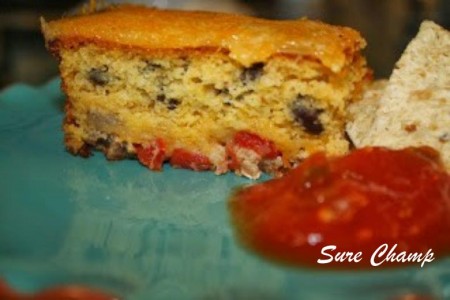
On your stove or electric skillet (at a show) brown ground beef and chopped onion until it is no longer pink and browned. I like to brown my ground beef before the show and have it ready to go in my cooler so that I can make this recipe a little more easily.
Drain excess fat and add 1 can green chili’s and 1 can of Rotel Tomatoes (I prefer the can with lime and cilantro). In a separate bowl prepare cornbread to package directions, reducing milk to 1 cup milk for both packages and add creamed corn to mixture. Set cornbread mixture aside. Do not cook cornbread yet.
In a 9 x 13 inch Pyrex or casserole dish if at home or in your large roaster pan at a show that has been sprayed with Pam cooking oil or greased, add hamburger mixture. Sprinkle 2 cups of cheese on top of hamburger mixture. Pour cornbread mixture on top of meat. Bake in a 425 degree oven for 45 minutes or until the top of your cornbread is slightly browned or in your roaster pan on 375 for the same amount of time or until the cornbread is brown on top and a fork stuck through the middle of the cornbread comes back clean (no raw cornmeal mixture on the fork). The last five minutes add 2 cups of grated cheese on top of cornbread. Allow to cool for ten minutes and cut in to squares or spoon out with a large spoon.
Serve with my Slap Your Momma Pinto Beans below, fresh garden tomatoes or my Pico de Gallo from at www.theranchkitchen.com site, tortilla chips and sweet banana or jalapeno peppers! Along with sweet iced tea or drinks from your coolers you have a fantastic meal anyone will love!
Note: For a state or county fair I would double or triple this recipe in my roaster.
1 – 16 ounce can of Pinto Beans (I prefer Bush’s Pinto Beans)
3 – 4 cups water
1 large onion chopped
1 stick margarine or butter
1 teaspoons garlic salt
1 teaspoon Tony Chachere’s Cajun Seasoning (like an All Spice Seasoning or multi-blend seasoning of your choice)
1 teaspoon black pepper
1/2 cup cilantro, chopped fine (optional)
Open can and place in a large dutch oven or roaster pot. Add 3 – 4 cups water as you do not want the beans with too much water. Add onion, margarine/butter and spices. Stir well. Bring heat slowly up to a boil on the beans and turn heating element down to a low simmer (low fire). Cook for 20 – 30 minutes. Add cilantro the last 5 minutes. Spoon beans into bowls with the juice. The bean broth is what will make you want to ‘slap your momma’ as we say in the south!
You can also drain the juice and serve on the side of you main dish as I did with my mom Virginia’s Mexican Cornbread. These Slap Your Mamma Beans are absolutely amazing the next day and at a show can be placed in a large Ziplock bag and reheated the next day.
Variation: Also, if you are a tomato lover, you can add canned tomatoes to the beans as well for an added flavor combination!
Note: For stock shows I double and triple this recipe and use 2 gallon size cans of pinto beans.
3 cups graham crackers, crushed finely
1 stick margarine or butter, melted
1 tablespoon of sugar
1 16 ounce package of semi sweet chocolate chips
1 large can of sweetened condensed milk
1 – 2 cups shredded coconut
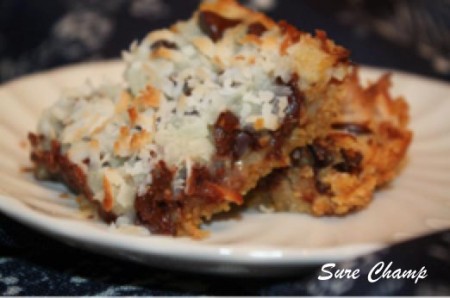
Melt margarine/butter in microwave for less than one minute. Spray 9 x 13 inch pan with oil. Add melted margarine/butter to the pan. Add graham cracker mixture that has had sugar mixed in it. Blend graham crackers with margarine until blended well and press to the glass dish to form a crust. Pour in long flowing strands the sweetened condensed milk on top of the graham cracker crust. Sprinkle semi-sweet chocolate chips on top of this. Sprinkle coconut on top of chocolate. Cook in the oven for 25 minutes at 350 degrees or until coconut begins to toast slightly.
Allow these to cool and then cut with a knife in diamond shapes or traditional squares. This will make around 2 dozen cookie bars.
Variation: You may also add nuts and peanut butter morsel chips for a variation. My girls just aren’t that wild about nuts and with the uncertainty of allergies of friends at the fair, nuts and peanut butter are not worth the risk!
Note: These are great to make ahead and pack in plastic containers to take to shows as we have done at almost everyone we go to. I place wax paper between each layer of these Magic Cookie Bars so that they arrive as pretty as when I cut them. Do make sure that you don’t leave them in your hot car or trailer. They travel easily, but you don’t want them to get overly warm. This is my middle daughter Bethany’s most requested dessert recipes besides the easy recipe below that we got from Pillsbury!

Pillsbury Funfetti Cookies
1 box Pillsbury Funfetti Cake mix
2 eggs
1/3 cup oil
Beat eggs with oil. Add to cake mix and blend until just moist. Place on cookie sheets and bake at 375 degrees until just browned on the bottom. My baker daughter is insistent that these cookies only brown slightly as they won’t get to hard as she says.
Icing is great on these as well, but make sure to pack them in between wax paper layers to transport.
This is another recipe we make for every show. Who says desserts have to be hard to make? Simple is definitely better and these cookies never come back home in the container!
Photo credits go to Pillsbury at http://www.pillsburybaking.com/recipes/funfetti-cookies-2404
Enjoy!
Alise Nolan – The Ranch Kitchen